
Brushes
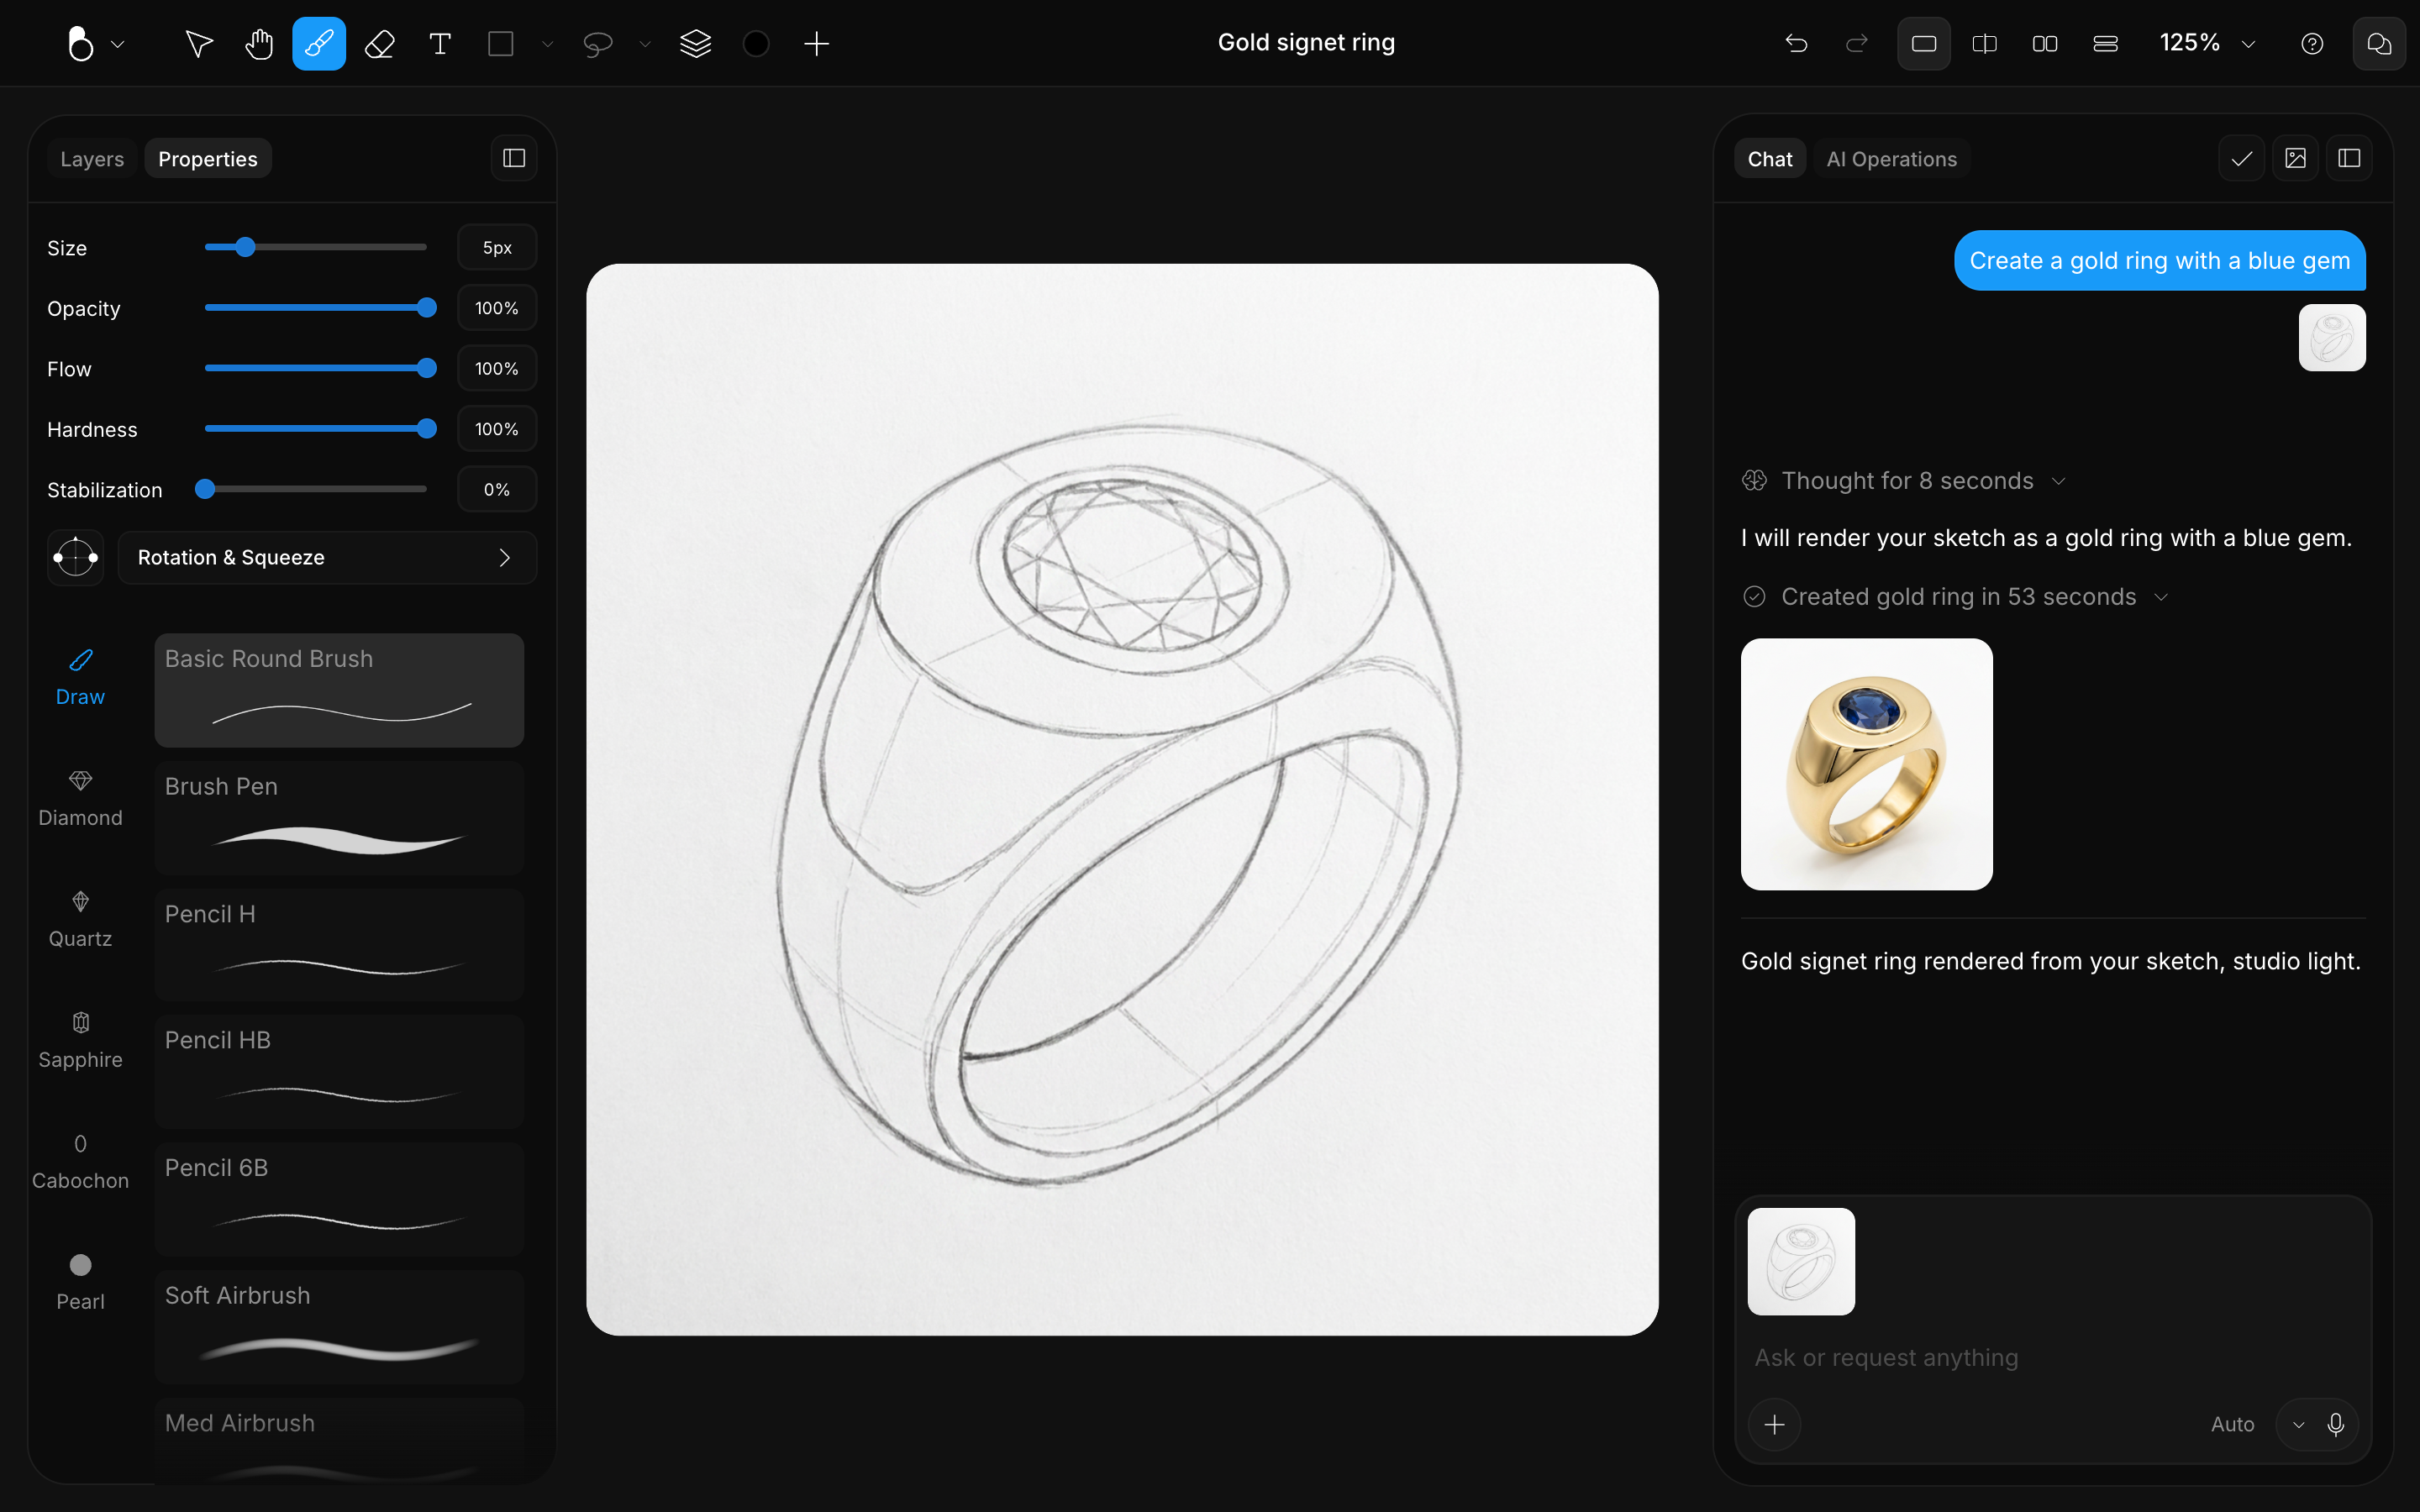
The Brush tool paints strokes onto the active layer. BLNG ships with a large brush library, from plain drawing brushes to specialized brushes that stamp gemstones, pearls, and metals, so you can sketch ideas or render jewelry detail by hand. Pick it from the toolbar or press B.
The brush library
The library sits under the brush settings in the Brush panel, grouped into tabs:
| Group | Use it for |
|---|---|
| Draw | General sketching and painting, 12 presets: Basic Round Brush (the default), Brush Pen, Pencil H / HB / 6B, Soft / Med / Hard Airbrush, Soft / Med / Hard Blend Airbrush, and Marker. |
| Diamond | 17 diamond cuts. Baguette, Brilliant, Coffin, Cushion, Emerald, Flanders, Heart, Hexagon, Marquise, Milgrain, Octagon, Oval, Pear, Princess, Radiant, Triangle, Trillion. |
| Sapphire / Quartz | The same family of gemstone cuts rendered as colored stones, 16 cuts each (every Diamond cut except Milgrain). |
| Cabochon | Smooth, domed stones. Solid, Silken, and Glassy finishes in Circle, Oval, Marquise, Drop, and Rectangle shapes. |
| Pearl | Pearls and pearl chains. Pearl and Pearl Chain, each in Light and Dark variants. |
Gemstone and pearl brushes
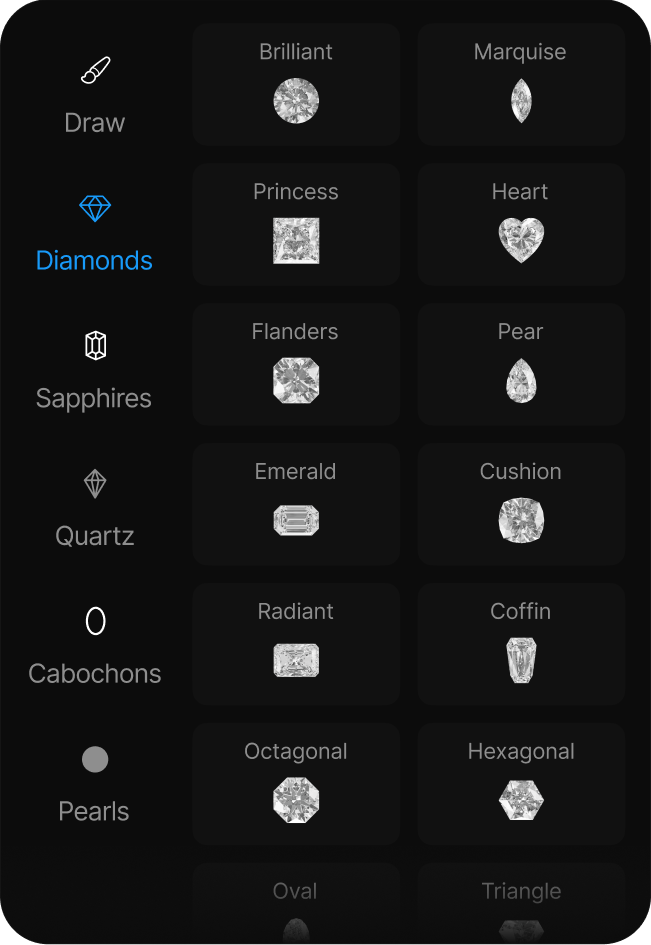
Gemstone brushes stamp a stone with every click, in the active color. To paint a row of diamonds: pick Brilliant (a classic round cut, and the default on the Diamond, Sapphire, and Quartz tabs), choose a color from the color palette, adjust the size, and click along your design. The Diamond menu holds 17 cuts in total, including Milgrain: a bead of metal used for decorative edges.
- Quartz and Sapphire render the same cuts with a different density; they reflect light differently, with Sapphire reading darker. Each holds 16 cuts (all the Diamond cuts except Milgrain).
- Cabochon gives a smooth, domed stone with its own distinct tone.
- Pearl brushes include single pearls and a pearl chain brush that draws a string of pearls as you stroke.
- Pearl brushes come in Light and Dark variants, which reflect light differently. Pick Dark when your color is dark, and Light for pale tones like white or light pink. (Cabochons offer Solid, Silken, and Glassy finishes instead.)
Brush settings
The settings sit at the top of the brush panel and apply to the brush you have selected, so each brush keeps its own values:
| Setting | Range | What it does |
|---|---|---|
| Size | 1–5000 px | Stroke width in pixels. |
| Opacity | 0–100% | How transparent the stroke is. |
| Flow | 0–100% | How much paint is released as you press down; lower it for gradual build-up. |
| Hardness | 0–100% | How soft or sharp the brush edge is. |
| Stabilization | 0–100% | Smooths and guides your stroke. Low keeps it quick and responsive; at full strength, strokes are guided toward near-straight lines. |
Reset brush, on the brush's own card in the library, puts those values back to the preset after a confirmation.
Rotation & Squeeze
Rotation & Squeeze opens a stamp control from the brush panel (on the iOS app the same row is labelled Squeeze & Rotation). It changes the shape of the stamp itself rather than the stroke, which is why it matters most on the gem and pearl brushes: left alone, they stamp a perfectly round shape.
- Rotation: an arrow sets how each stamp is oriented, at any angle in degrees.
- Squeeze: pinch the stamp from perfectly round (100%) down to a squashed oval (30%), useful for perspective views that match your reference.
Quick adjustments and shortcuts
- Decrease / increase size: press [ or ] while drawing.
- Show / hide the brush cursor: press Tab.
- Color: the brush paints in the active color; set it with the Color picker (C) or sample one with the Eyedropper (I).
The Eraser
The Eraser (E) shares this whole panel: the same brush library and the same Size, Opacity, Flow, Hardness, and Stabilization controls, just negative instead of additive. A soft blend airbrush is the one worth knowing here: it feathers the edge as it erases, blending two layers together without a sharp line. See Eraser.
How to draw
BLNG gives you a full set of drawing tools so you can sketch, block in shapes, and refine artwork directly on the Canvas: either as a starting point for the AI or to finish a generated result by hand.
The drawing tools
Drawing takes more than the brush, and these are the toolbar tools you reach for alongside it. For the whole toolbar, see Toolbar & Tools.
| Tool | Shortcut | What it does |
|---|---|---|
| Brush | B | Paint strokes on the active layer with the brush and settings you picked. |
| Eraser | E | Erase from the active layer using the same controls as the brush. See Eraser. |
| Color picker | C | Open the color picker to set the active color. See Colors & Material Presets. |
| Eyedropper | I | Sample a color from anywhere on the canvas. |
| Selection | M | Draw a selection so edits only affect that area. See Selection. |
Drawing a stroke
- Select the Brush tool.
- Set your color with the Color picker, and choose a brush from the brush library.
- Adjust Size and Opacity in the brush settings, then draw on the canvas.
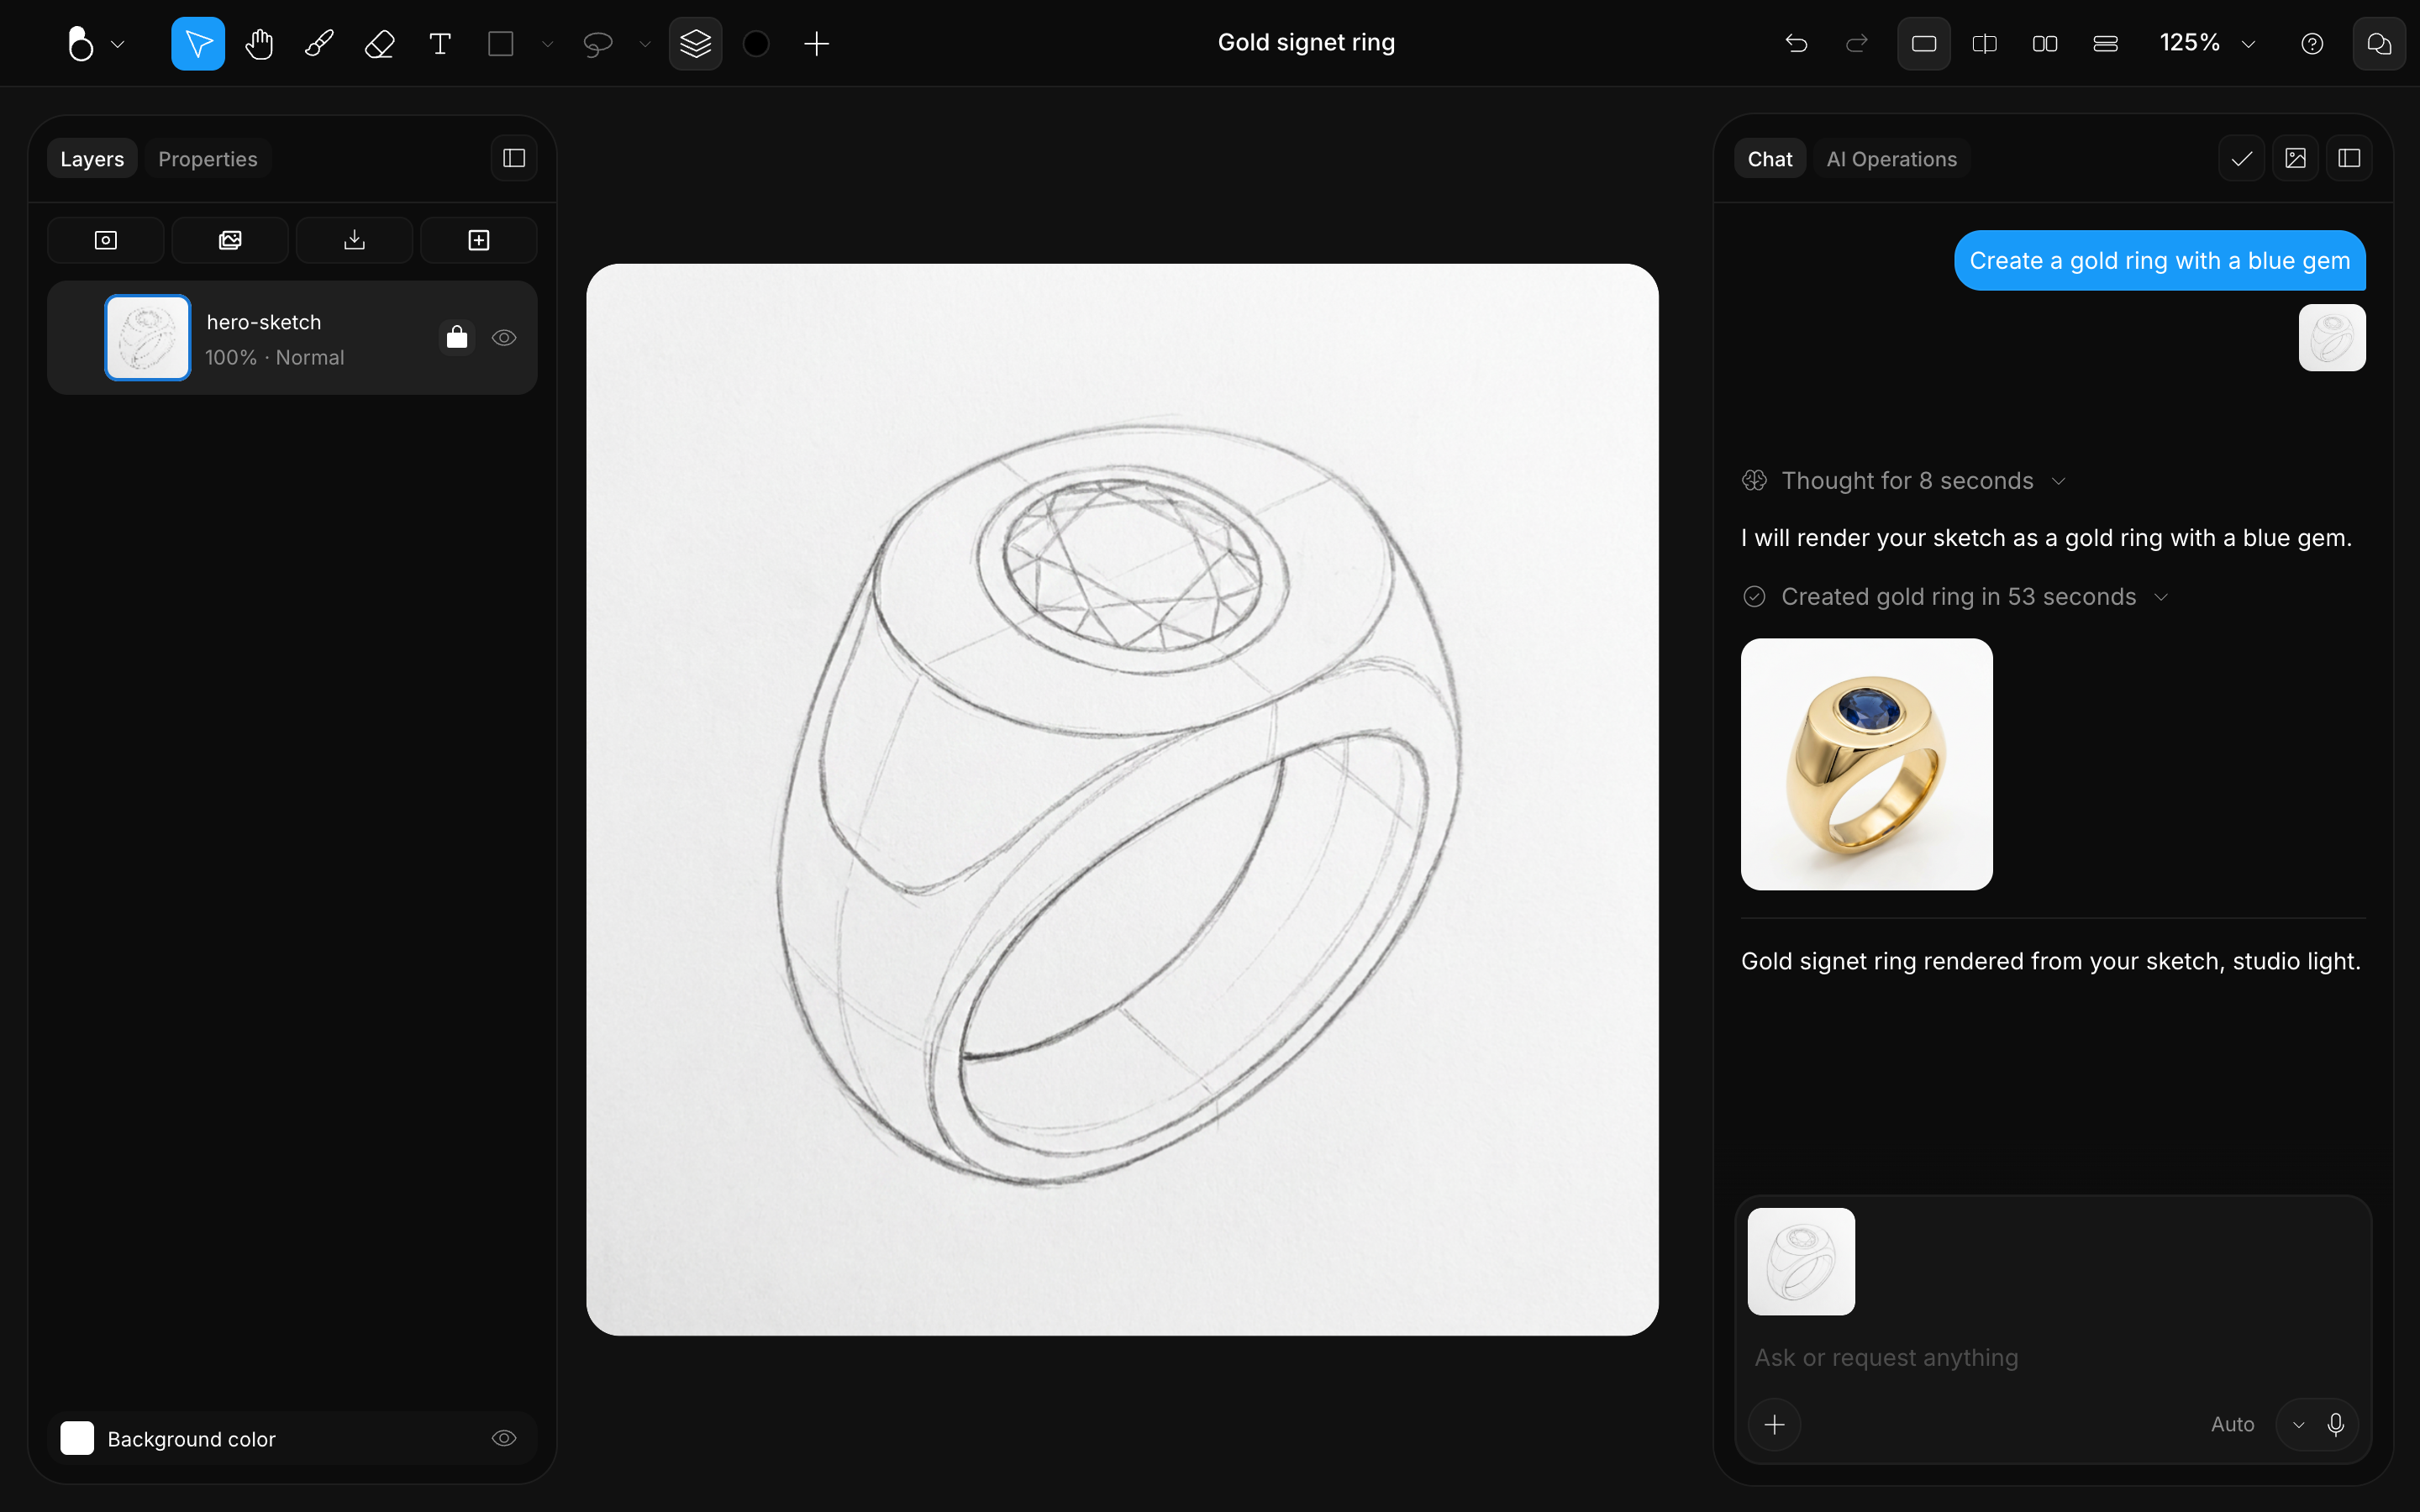
Drawing happens on the active layer. Add and reorder layers so you can paint, erase, and adjust parts of your design independently. See Layers.
Working with what you draw
Your drawing isn't just for finishing touches; it guides the AI. Use the brush to sketch a rough idea, set the influence of your canvas, and let the AI turn your sketch into a photorealistic render. You can then paint over the result, or mask an area to regenerate just that part. See Influence and Masks.
Undo and redo
Every stroke is undoable. Press Cmd/Ctrl + Z to undo and Cmd/Ctrl + Shift + Z to redo, so you can step back through the edits you just made and try another approach.
Drawing tools are available on the desktop web app and the iOS app. On iPad, you can draw with your finger or an Apple Pencil; see Apple Pencil (iOS).