
Filters & Adjustments
Filters and adjustments change the tone and color of an image directly: no prompt, no generation, instant results. Finished looks live in preset families; the catalog also has manual tools such as Curves, Levels, Invert, and Find Edges.
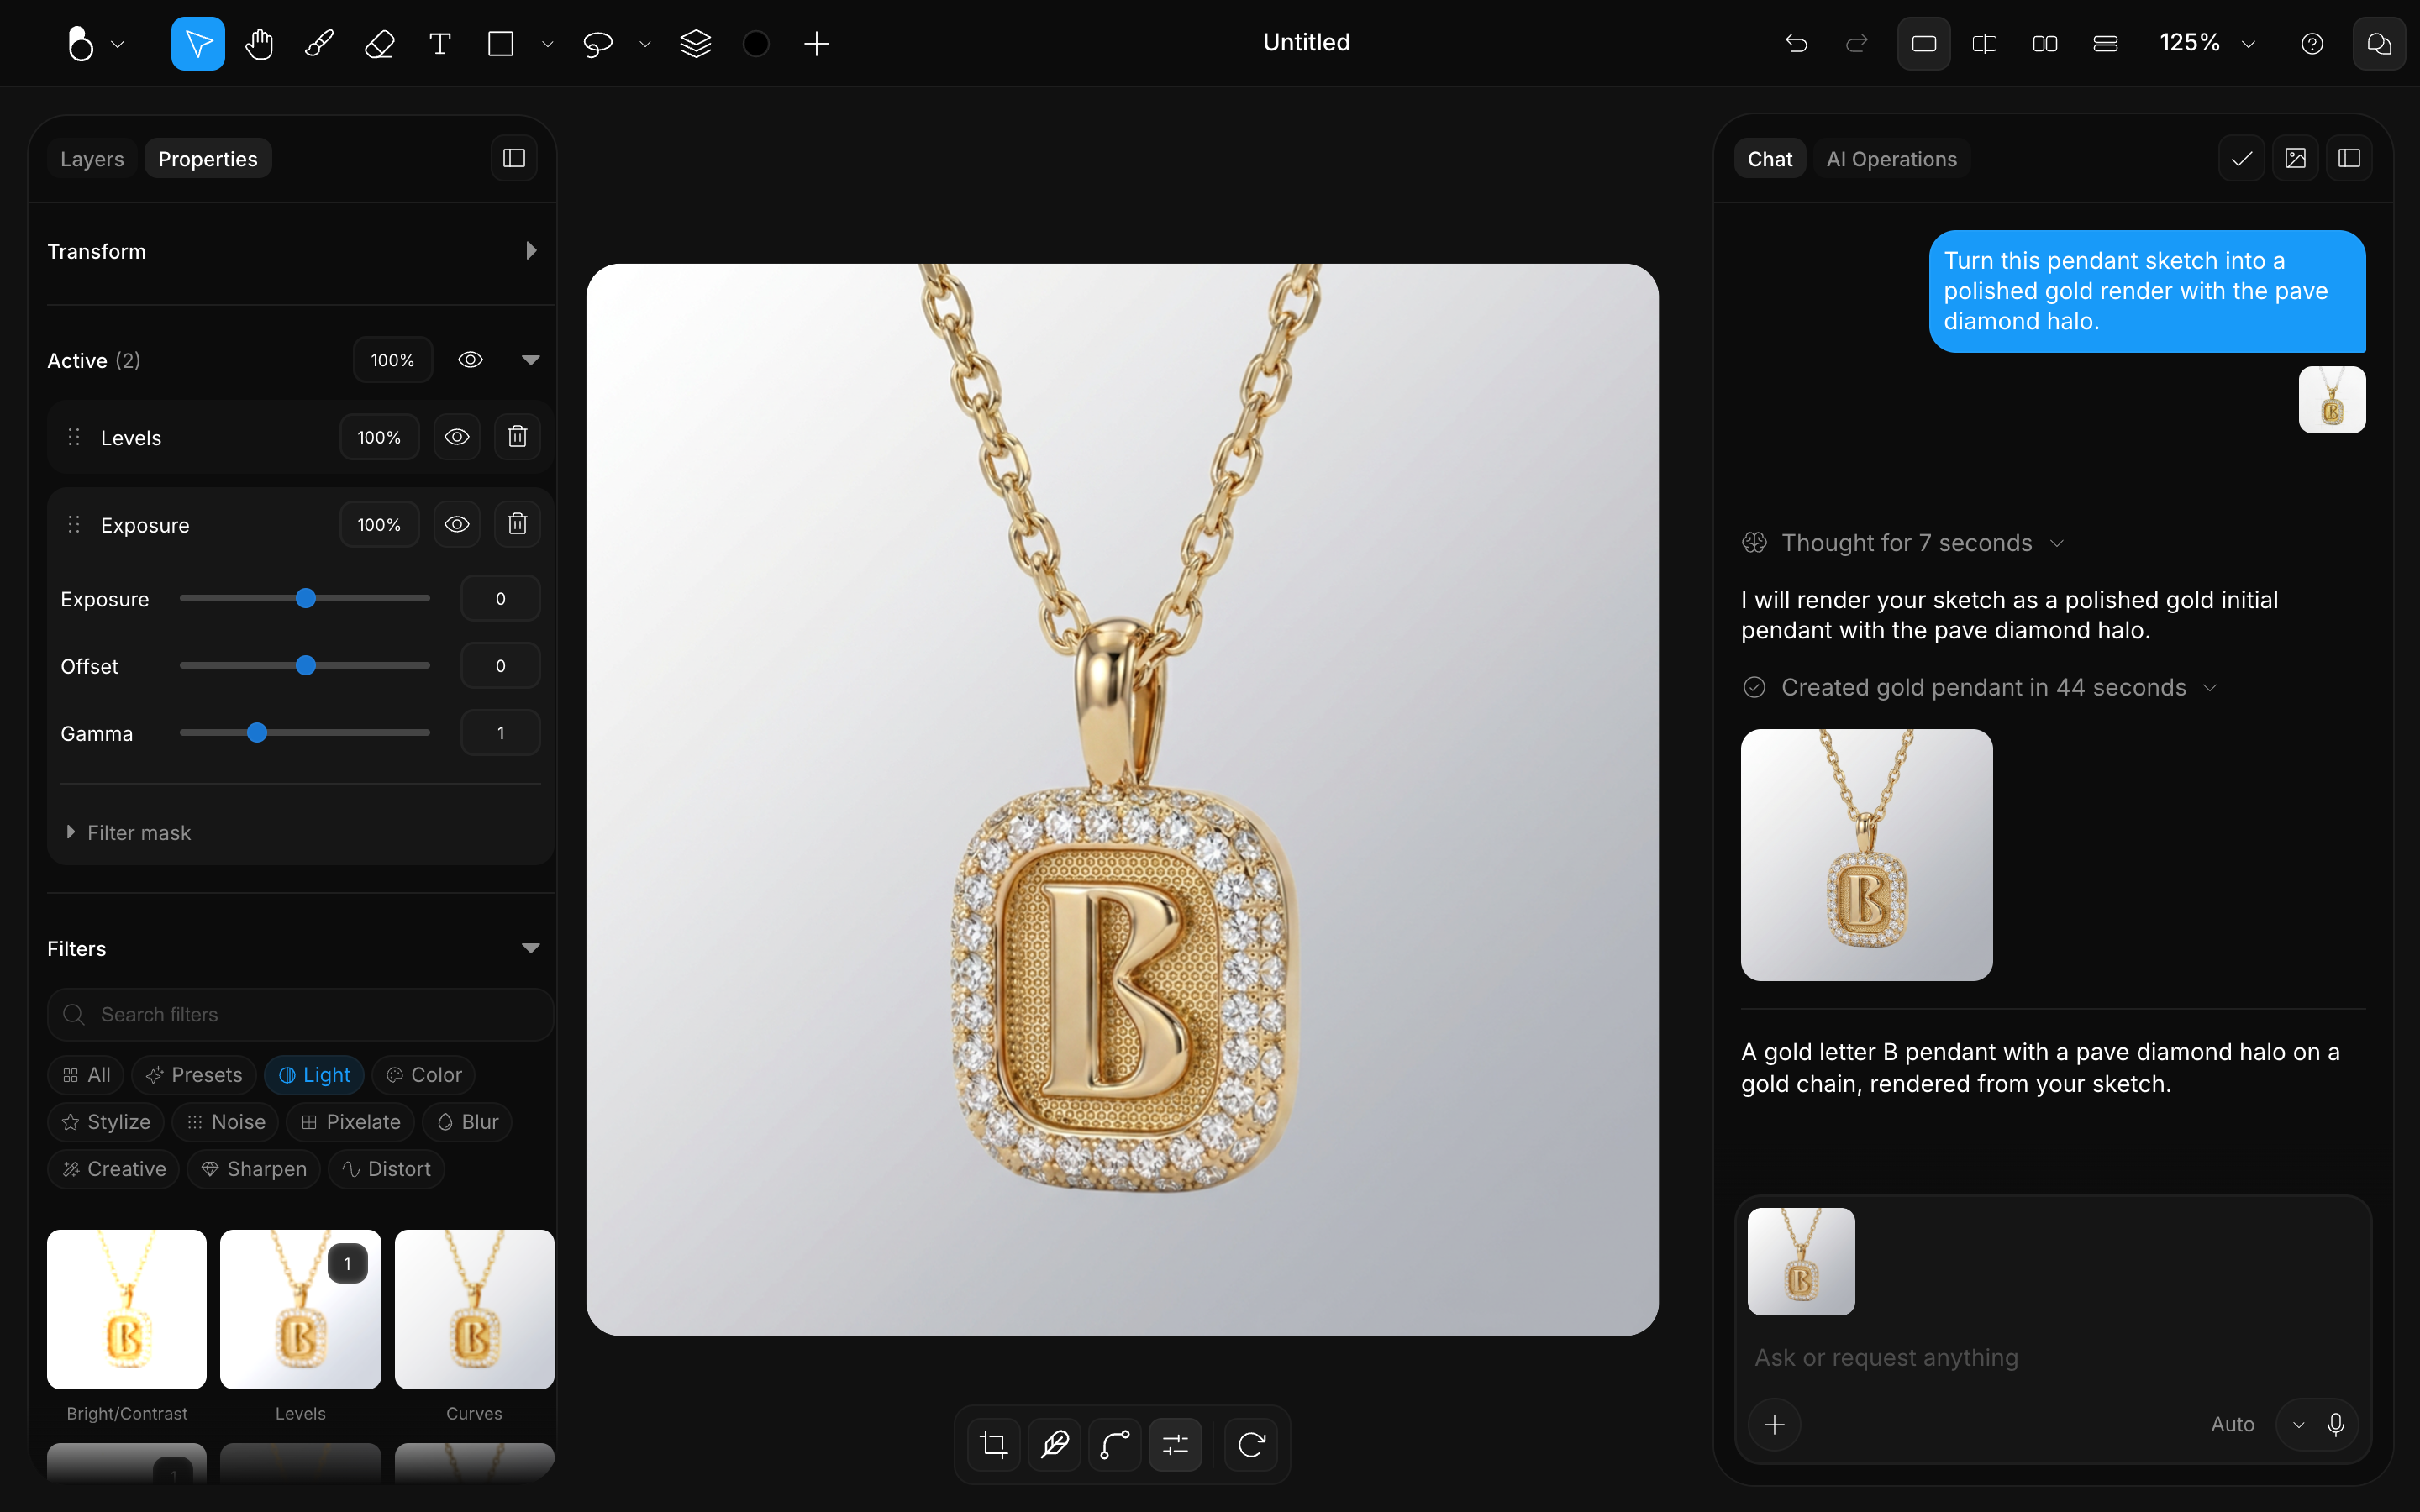
Opening Filters
Filters are part of the Properties panel for a selected image, not the top toolbar.
- Select one or more images, then click the sliders icon on the image toolbar (Image properties).
- Or open the left-hand sidebar (
Lopens Layers) and switch to the Properties tab.
Properties only shows Filters when the selection is images, one image or several. Mix in a shape, text, or group and the Filters sections hide.
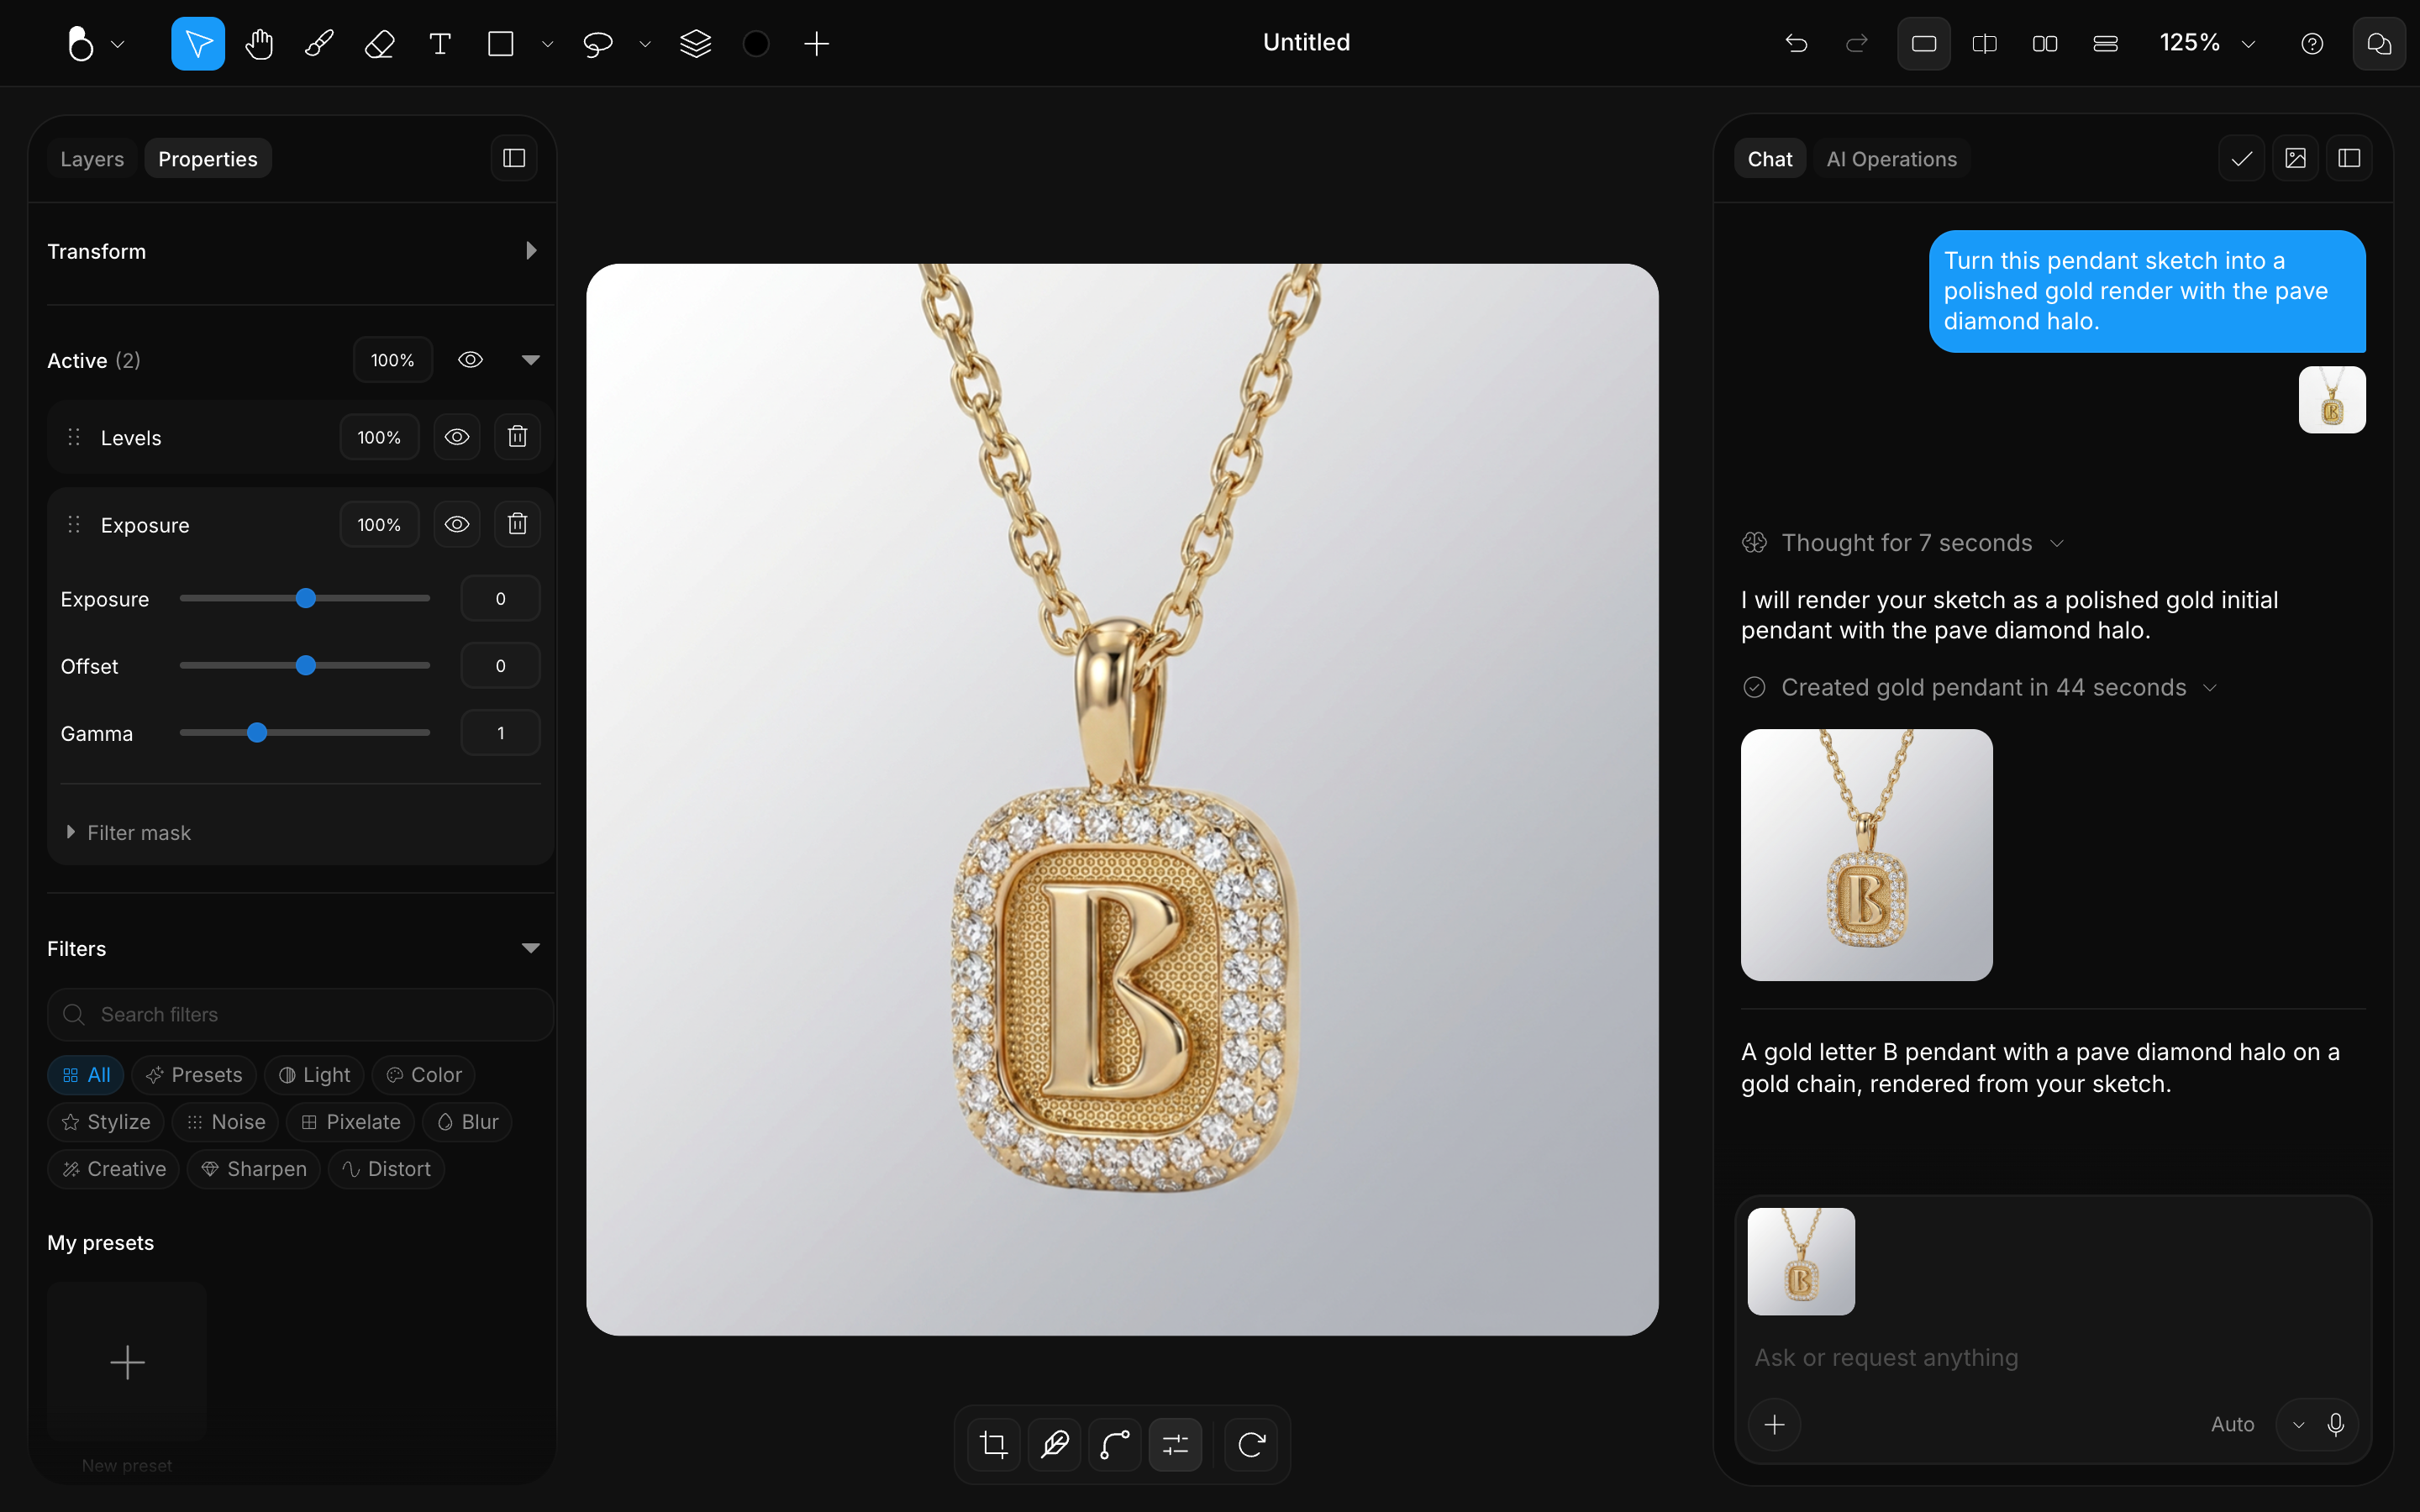
Active stack and Filters catalog
The Filters sections split into what is already on the image and what you can add to it:
- Active: the stack already on the image. Reorder rows, turn a look on or off with the eye, remove it, or expand it to edit. The header has a master mix (%) for the whole stack and a Compare original control so you can flash the unfiltered image.
- Filters: the catalog. Use All, Presets, or a category (Light, Color, Stylize, and the rest) to add a look or a single tool. Each Active row also has its own mix (%).
The Presets pane also holds My presets, where New preset saves the current stack as a look on this device. The built-in families work without it.
One image or several
Filters apply to the images you have selected:
- One image: Active and the catalog edit that image only.
- Several images with the same stack: adding, toggling, reordering, and shared settings apply to all of them.
- Several images with different stacks: Active shows Mixed and the catalog hides until the stacks match. Masks always stay on the image you painted them on.
Filters preset families
The Presets pane groups the built-in looks into named families:
- Black & White: Noir, Silver, High Contrast.
- Film: Matte Fade, Vintage Warm, Retro Cool, Kodak Glow.
- Cinematic: Teal & Orange, Moody, Blockbuster, Bleach Bypass.
- Portrait: Soft Glow, Warm Skin.
- Vivid: Punch, HDR Pop.
- Mood: Golden Hour, Cool Blue, Dreamy.
Try a few: filters are instant, so comparing looks costs nothing.
Manual tools
Beyond the preset families, the catalog holds single tools you set by hand. The ones you will reach for most:
- Curves: reshape tone by dragging points on the curve: lift shadows, tame highlights, or add contrast with a gentle S-shape. RGB plus per-channel curves.
- Levels: set the black point, white point, and midtones to control overall brightness and contrast.
- Invert: flip the image colors (Creative).
- Find Edges: a stylized outline look (Stylize).
Browse the other catalog categories for the rest of the single tools: Light, Color, Stylize, Noise, Pixelate, Blur, Creative, Sharpen, and Distort.
Filters vs. AI edits
Filters and adjustments change how the existing pixels look; they never redraw your design. Use them for tone, color, and mood. When you want to change the design itself (a different metal, stone, or setting), use a prompt instead. See Edit & Regenerate.
Heads up
Apply filters at the end of your workflow. If you filter first and then regenerate, the AI works from the filtered canvas, and the look gets baked into everything that follows.