Masks
A mask controls which parts of a layer are visible; it never deletes pixels, it hides them. The mask is a grayscale image that sits on the layer: white areas stay visible, black areas are hidden, and gray gives partial transparency. You can refine, disable, or delete a mask at any time.
A mask often starts with a live selection. For the selection modes and the refining controls, see Selection.
Creating a mask
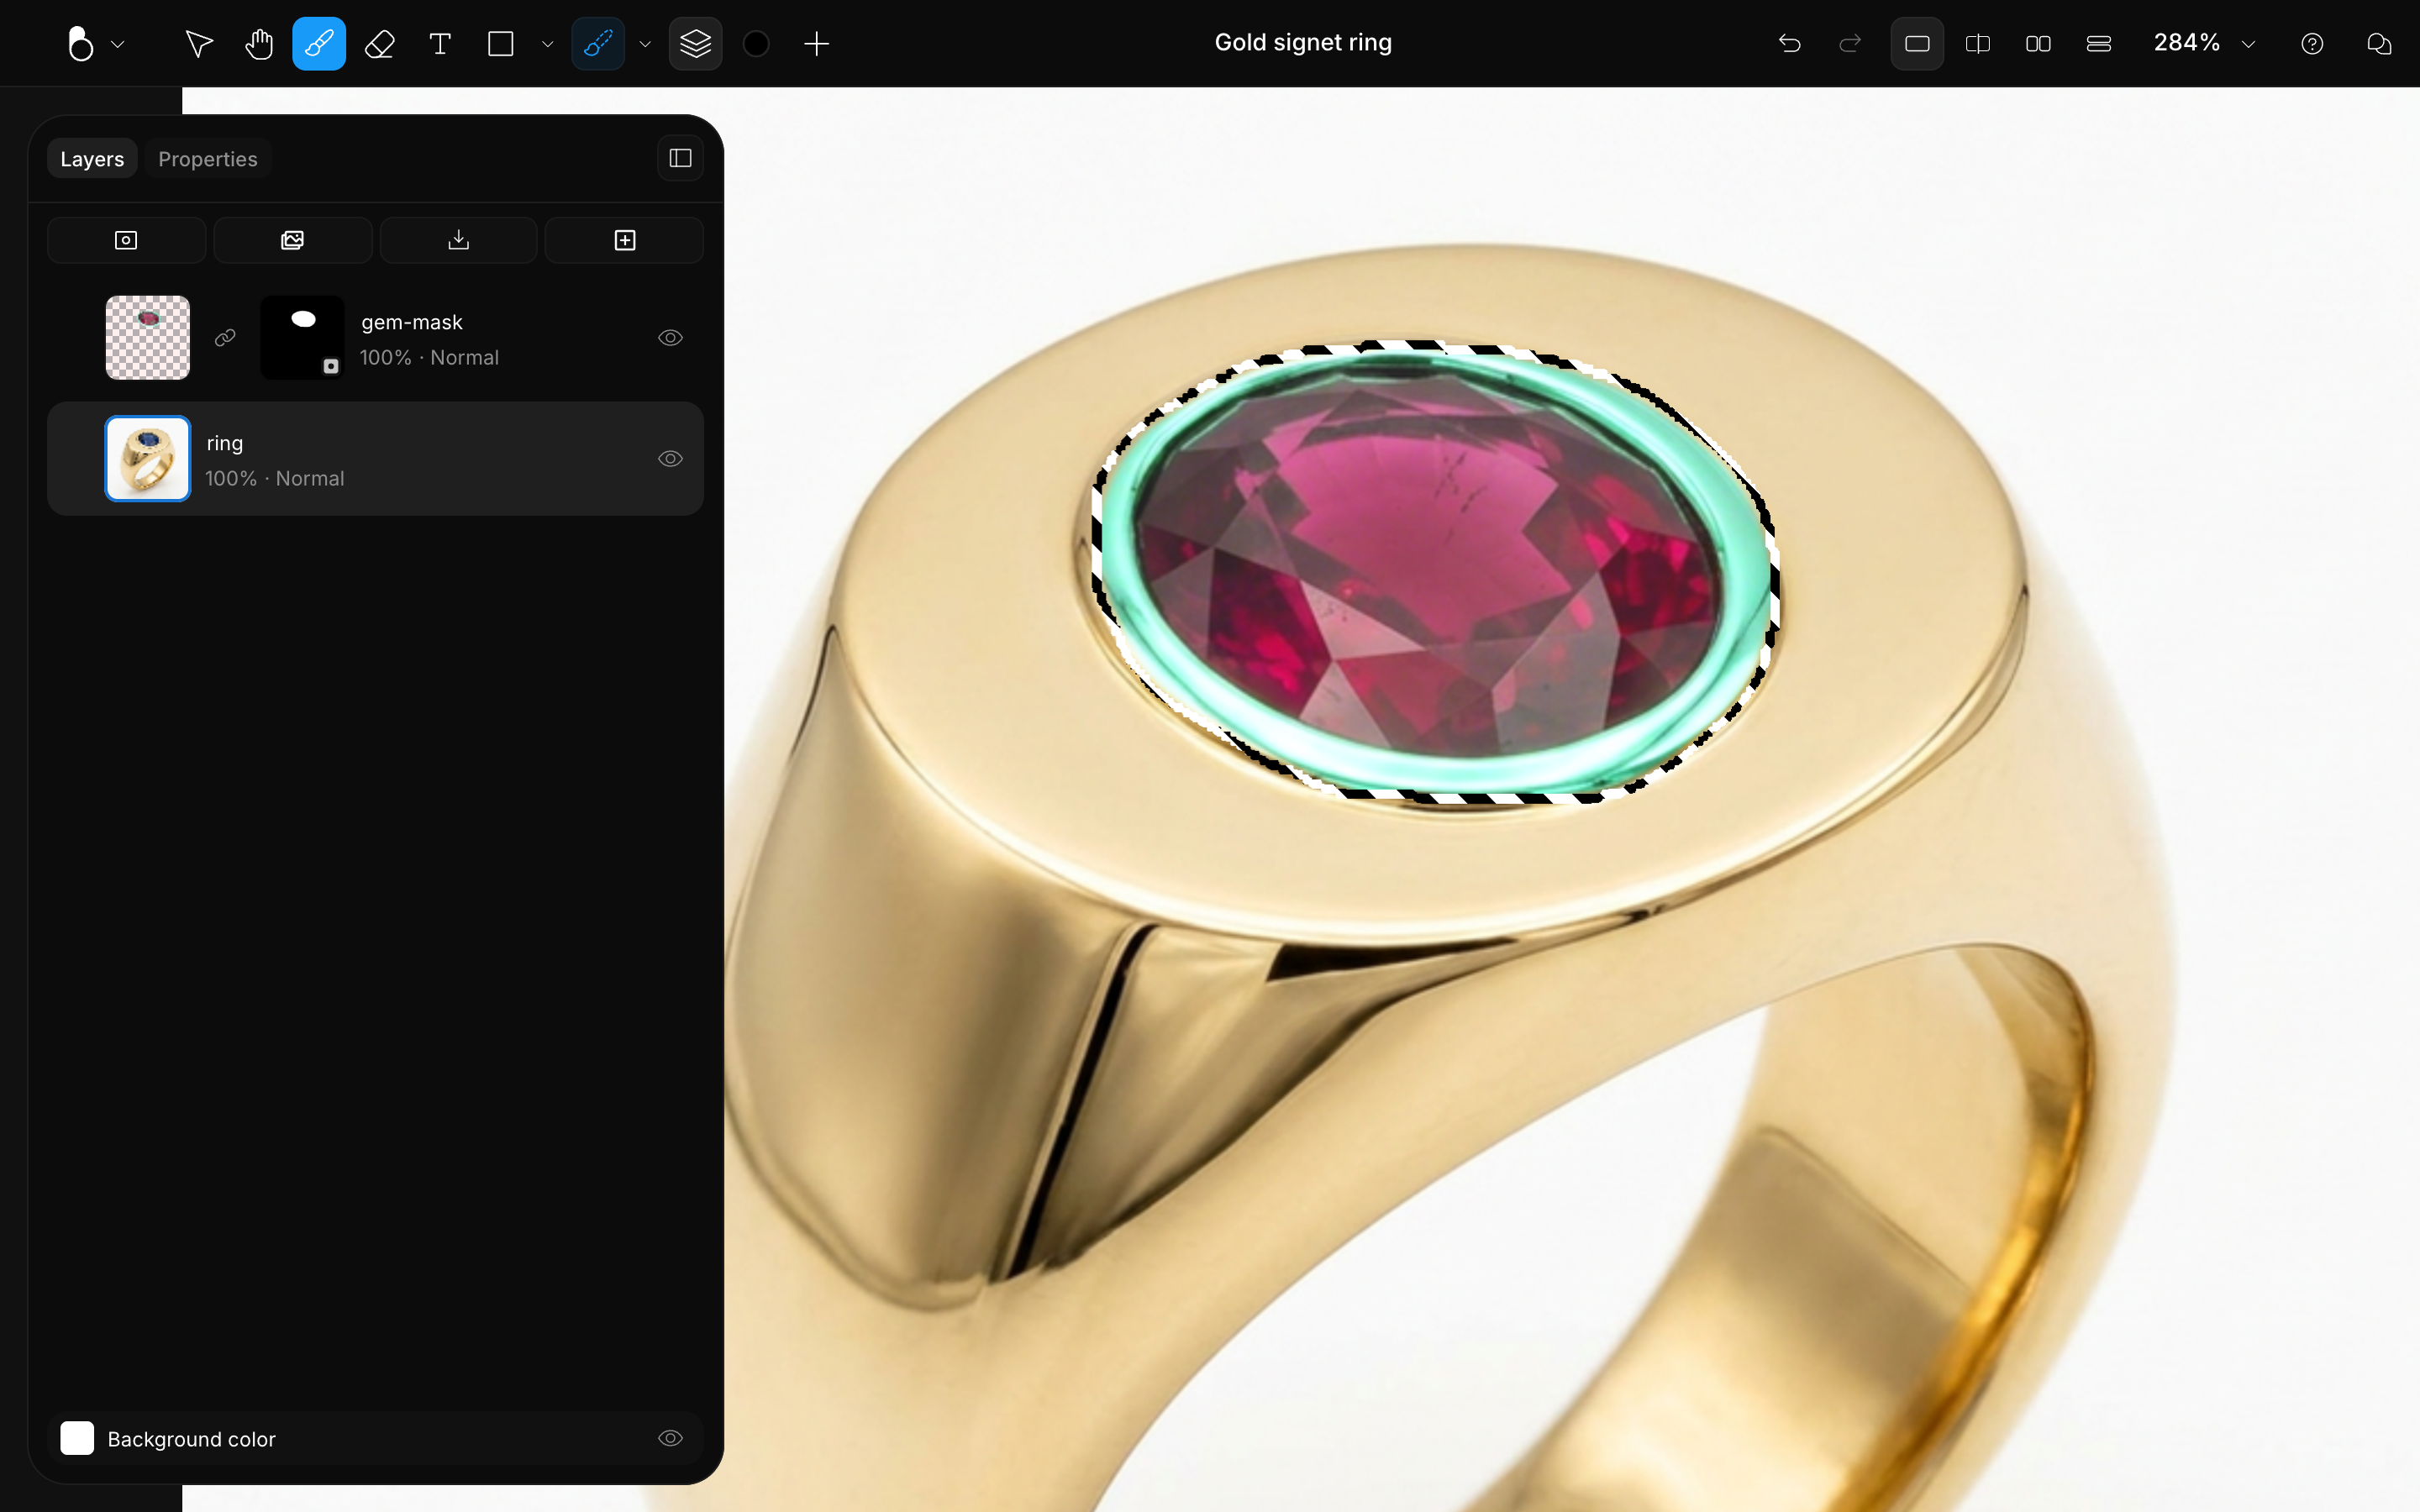
There are three ways to create a mask:
- From a selection: with a selection active, click Create mask in the bottom toolbar, or press Enter. The selected area stays visible; everything outside it is hidden. If a group is selected, the mask is created on the group.
- From the Layers panel: right-click a layer or a group and choose Add layer mask. The new mask is white, so nothing is hidden yet, and you land straight in mask editing with the Brush ready.
- Copy to a new layer: with a selection active, press Cmd/Ctrl + J to duplicate just the selected part of the layer onto a new layer.
Editing a mask
Click a layer's mask thumbnail in the Layers panel to enter mask editing; creating a mask from the Layers panel drops you in automatically. The Brush is selected for you and set to subtract, so every stroke hides. Any brush from the library works on a mask, gemstone brushes included: each stroke carves that brush's shape out of the layer, revealing what's behind it.
While you edit, the bottom toolbar carries the mask controls:
- Add and Subtract: Subtract paints black to hide parts of the layer, Add paints white to reveal them again. If you pick a color from the color panel, it is converted to the gray of the same brightness, because masks are always grayscale.
- Feather selection: soften the mask edge for smoother blends.
- Invert mask (Shift + I): swap the visible and hidden areas.
- View mode: switch between Canvas, which shows the masked result live, and Black & white, which shows the mask itself and makes stray spots easy to find.
- Reset mask edits: undo everything you have painted since you entered mask editing. It doesn't delete the mask, and it stays grayed out until there is something to undo.
The selection tools keep working inside mask editing: make a selection first and your painting is clipped to it, Magic Wand selections included.

Managing masks
The mask thumbnail on a layer row is also your control center:
- Shift + click the thumbnail to disable or re-enable the mask (a cross appears over the thumbnail while it is off).
- Link icon: link or unlink the mask from its layer. Linked masks move with the layer; unlinked masks stay put when the layer moves.
- Drag the thumbnail onto another layer to move the mask there; hold Alt/Option while dragging to copy it instead.
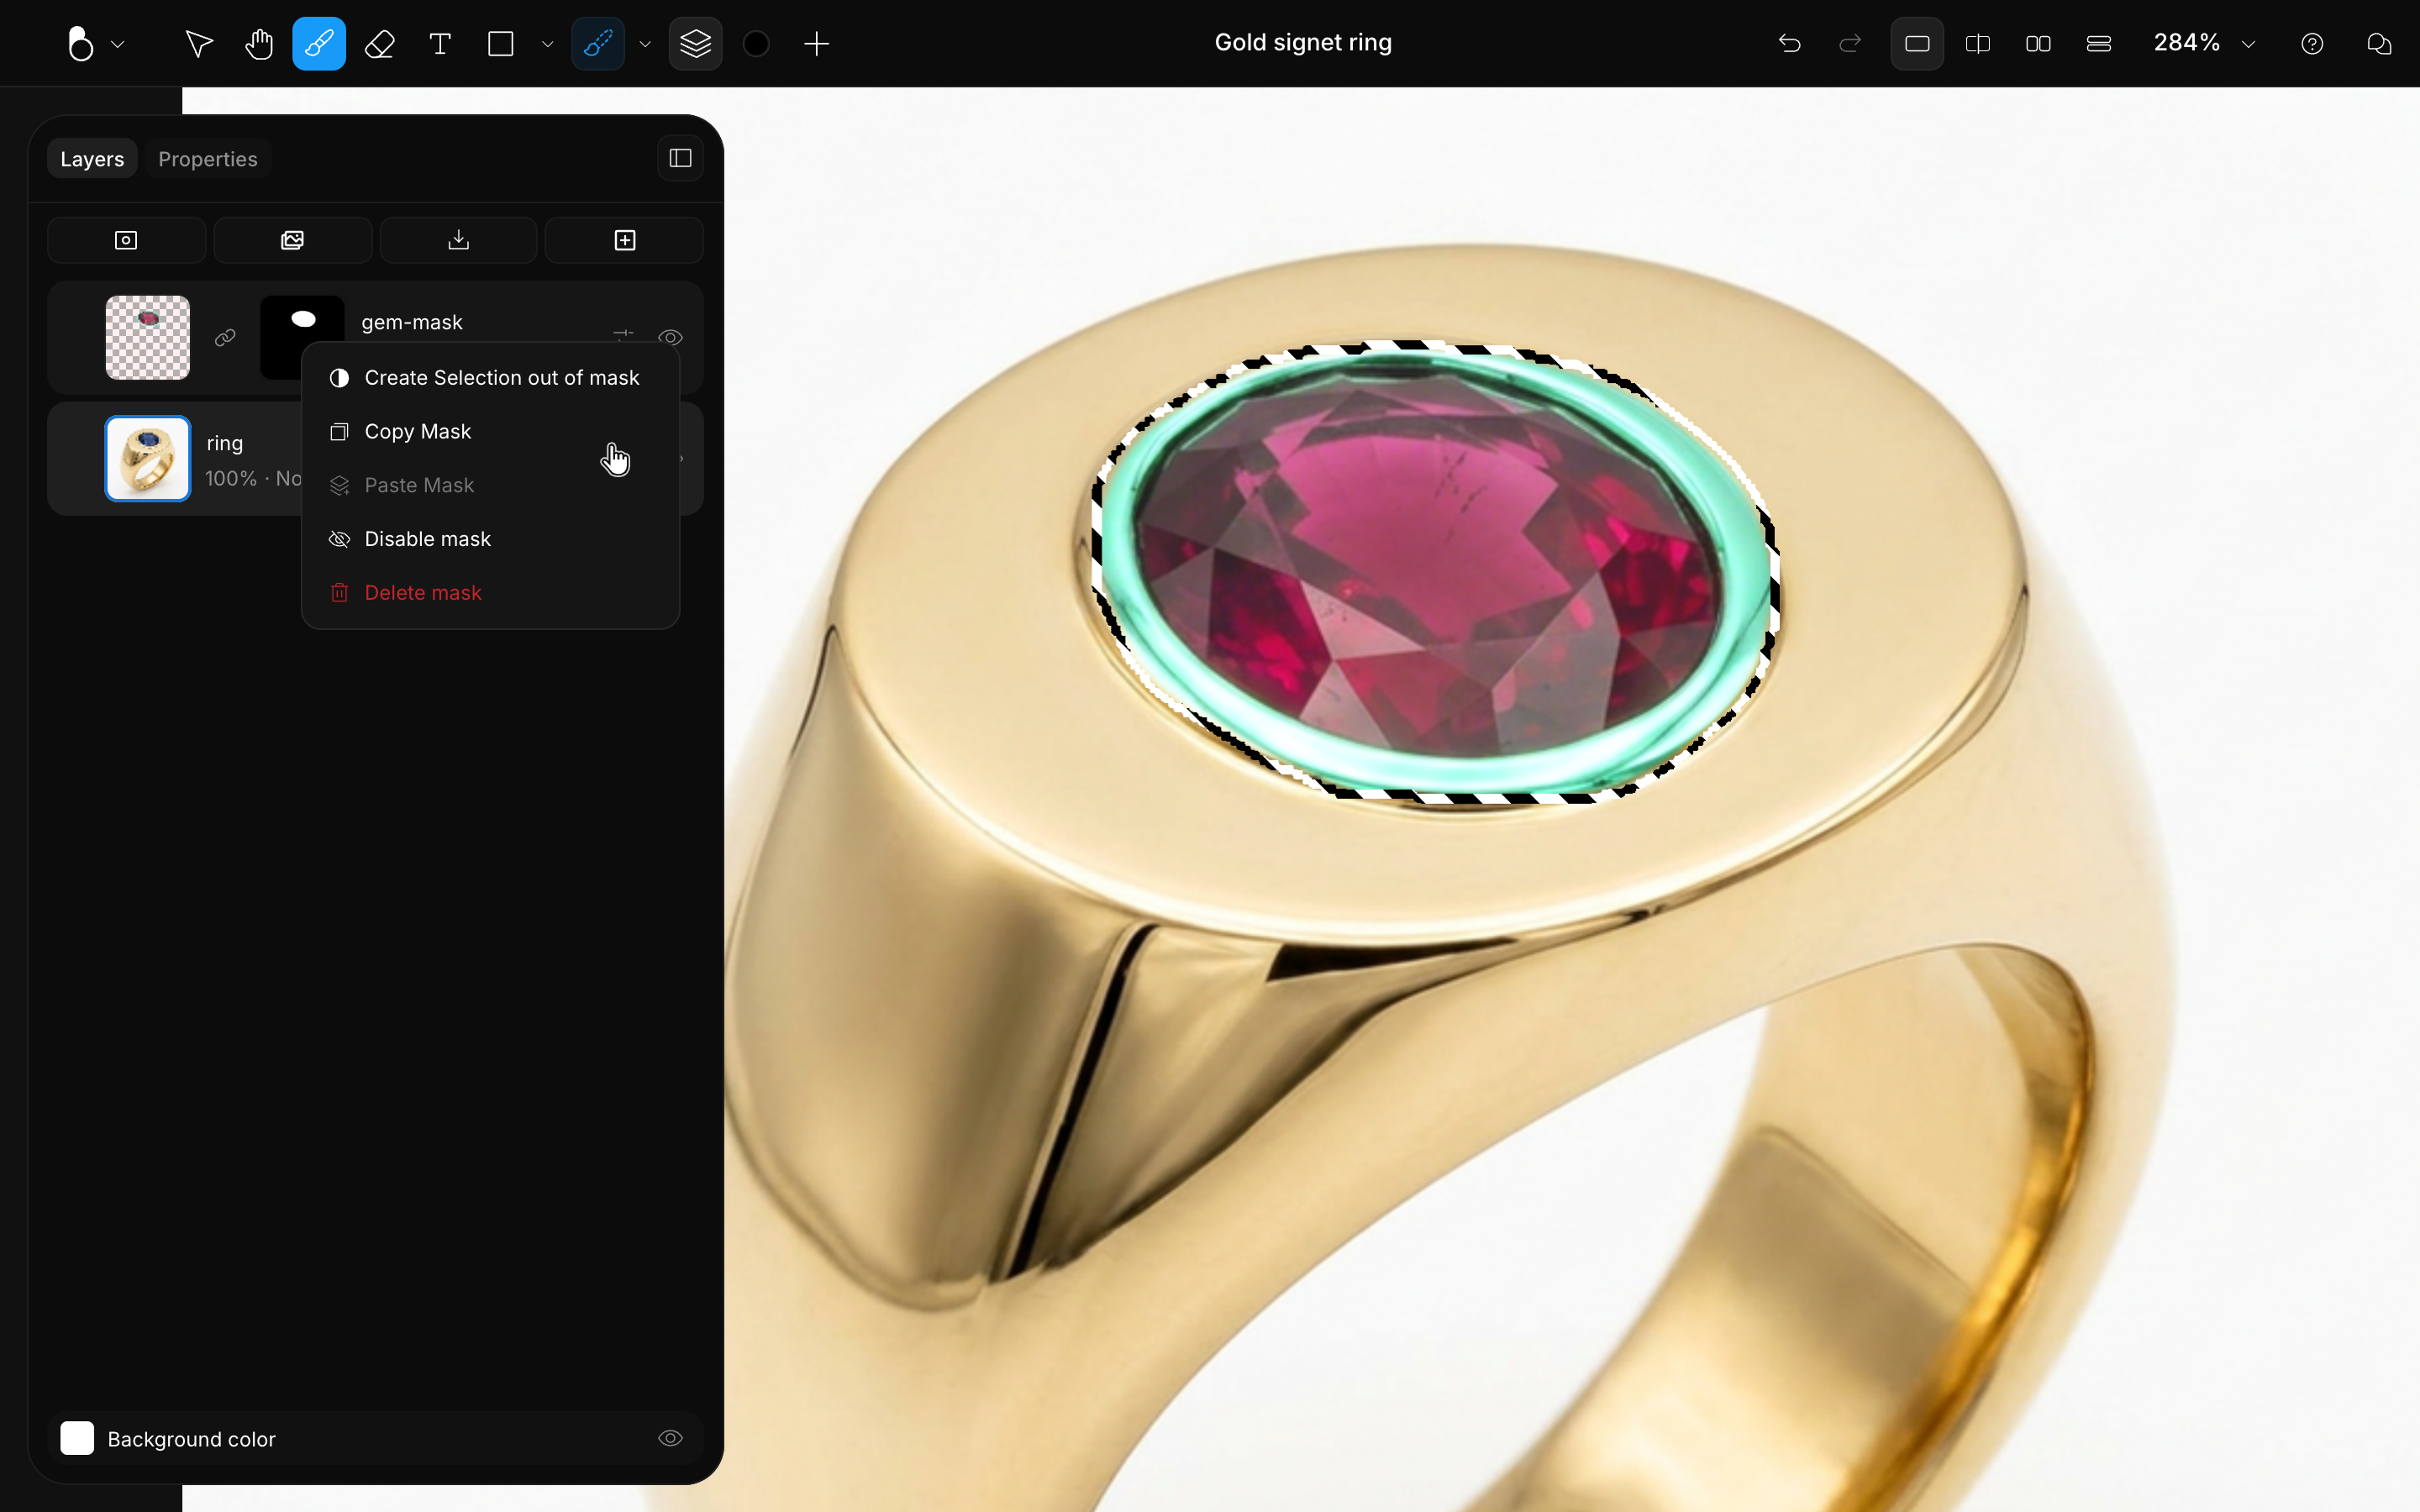
- Right-click the thumbnail for the full menu:
- Create Selection out of mask: load the mask's shape as a selection.
- Copy Mask / Paste Mask: transfer a mask between layers or groups.
- Disable mask / Enable mask: toggle it without deleting.
- Delete mask: remove the mask permanently. The layer's hidden areas become visible again.
Groups can carry masks too: one mask then controls the visibility of every layer inside the group.
Masking to guide the AI
A mask is the strongest guarantee BLNG offers: everything outside it physically cannot change. When an edit keeps disturbing parts of the design it shouldn't (proportions, neighboring stones, the band), mask first, then prompt. Canvas influence still applies, but only inside the mask, and it is the dial that decides how much of the original shape survives:
- Keep the shape, change the color or material: mask the area, describe the change ("change the center stone to a red ruby"), and set canvas influence to Full.
- Change the shape as well: same mask, a prompt that describes the new structure ("a princess-cut ruby surrounded by a halo of white diamonds"), and canvas influence at Low so the AI is free to rebuild the region.
- Guide it with your own drawing: sketch inside the mask to show the detail or shape you have in mind, erasing what has to go first when you are replacing something, then prompt. Raise canvas influence according to how strictly you want your drawing followed.
See Influence for what each level does, and Precise Edits for the other ways to pin an edit down.
Tip
Masks work best when the selected area isn't too small. Very tiny masks can lead to less predictable results.
Masks on iPad
On iPad and iPhone, masks behave the same way as on the web. Draw a selection by touch or with an Apple Pencil, then use Create mask to turn it into a mask and regenerate just that area.